

During a kitchen renovation, furniture update, or installation of a new set, the stage of countertop installation is always assumed. The manufacturer usually performs this procedure, where the cabinets are purchased according to the design project.
As a rule, the price of the service is “sewn” into the cost of the kitchen, even if the manager talks about the free work of the craftsmen. Since the assembly of the working part has no special nuances, you can do it yourself, saving a certain percentage of costs.
In this article, we will tell you in more detail how to install a countertop step by step to get a decent result and not spoil the material.
When is it better to resort to self-installation?
First, you need to understand the installation process itself, which does not require supernatural efforts and special skills. Everything can be done with ordinary tools. However, we do not recommend refusing the help of professionals without studying the issue. Perhaps in your case, it will be better to entrust the work to specialists.
You can carry out the installation yourself if:
- it is planned to replace only the work surface, and not the entire set – in this case, it is enough to lay the new material according to the dimensions of the old one;
- you have skills in processing chipboard, MDF, or wood – since manufacturers bring large sheets of tabletops to the sites, they need to be cut to size on site, the edges need to be processed and sealed to protect the edge from moisture, and also different coverings need to be joined if the furniture is corner.
You should contact a professional for installation in the following cases:
- you have never assembled furniture, you don’t have any tools;
- assembly is included in the cost of installing kitchen units;
- it is planned to install non-standard furniture with a complex design, which includes a shaped cut of the working part;
- the tabletop is made of expensive material – working with natural stone due to its fragility, high weight and density requires skills from craftsmen, so if you do not have the equipment and experience, you should not take on the sawing. There is a risk of damaging the working part.
If you want to do everything yourself, you need to remember that when ordering installation from a company, you additionally receive a guarantee. In case of a mistake by the craftsmen and a defect during installation, the manufacturer will compensate for the damage. If you do everything yourself, you need to accept the associated risks.
We offer detailed instructions on how to install a laminated chipboard or fiberboard countertop.
Important: “Looking for top kitchen remodeling contractors in North Charleston, SC? Get expert design and quality craftsmanship for your kitchen upgrade. Start your project today!”
Tool preparation
To process and install the countertop, you will need the following tools:
- tape measure, level (laser level is acceptable), pencil or marker with a fine tip;
- silicone sealant and a gun for working with it;
- a hacksaw or a jigsaw with a wood saw blade – it is better to choose a power tool, as it will allow you to make a seam quickly and neatly;
- fasteners – they need to be selected according to the dimensions and weight of the tabletop;
- decor – aluminum strips that hide joints and make the installation complete (needed if the working part has several connecting surfaces).
If you need to cut the front edge, prepare the adhesive tape in advance, selected according to the design. It is better to order it from the manufacturer where the countertop is purchased. This will eliminate the discrepancy between the textures of the front and the edge.
How is the installation carried out?
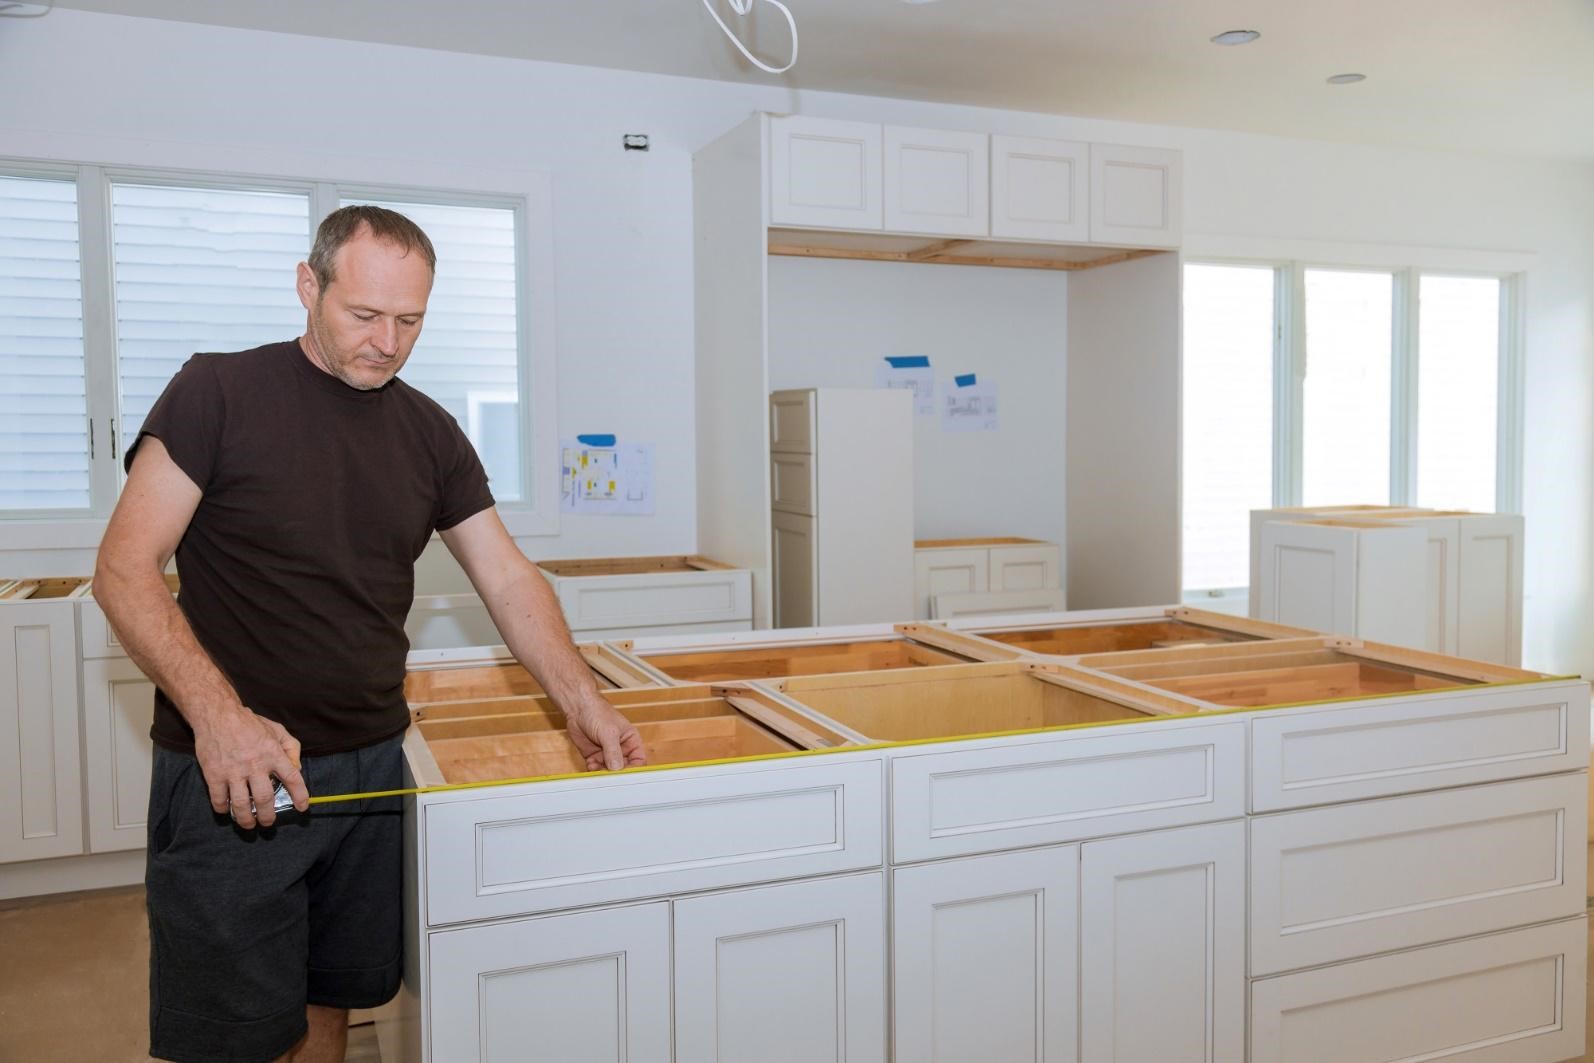
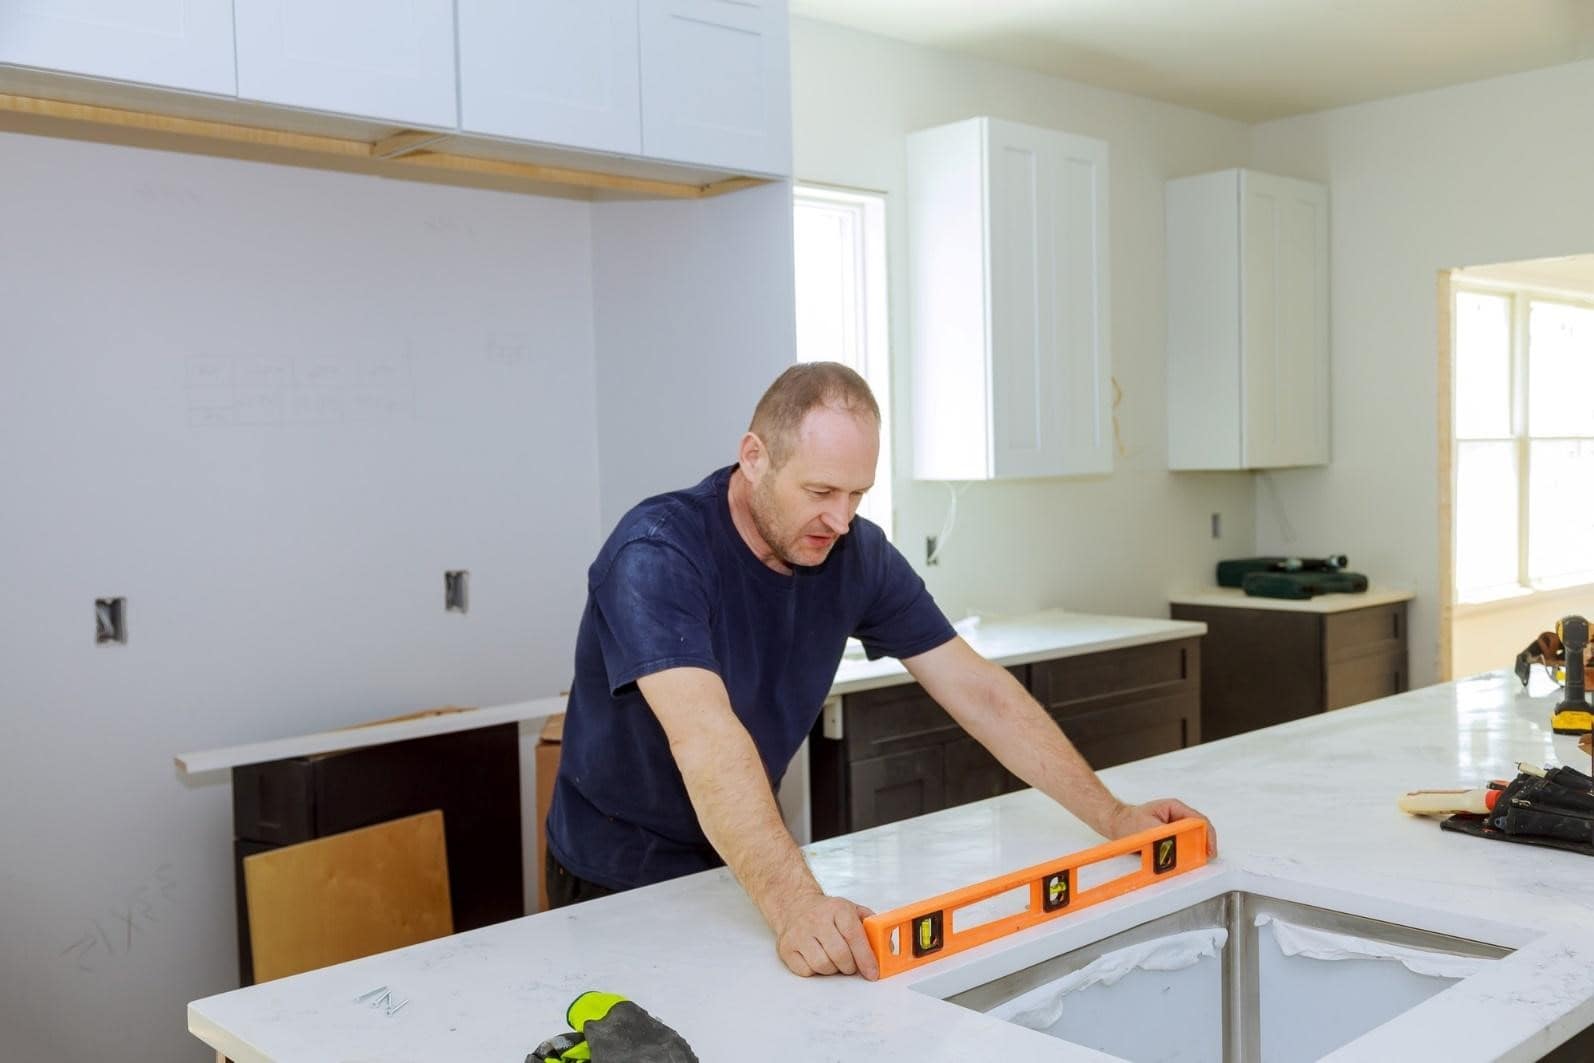
The table can be fixed only after the cabinets are assembled and tightened. Each section must be leveled so that there is no uneven distribution of the weight of the working part. Especially if it is made of stone.
If the installation is carried out with a tabletop that is placed on the cabinets in sections, no cutting is done, so you can immediately proceed to installation. This combination is typical for small kitchens. As a rule, these models are attached from the end part.
The classic solution is when several cabinets are installed in the room, which are located lengthwise and covered with a monolithic slab. If an L-shaped set is ordered, the manufacturer will bring a large sheet. It will need to be cut to size independently.
Step by step this work looks like this:
Using a jigsaw, cut the slab into the required number of elements. You need to consider the size of the working part, as well as the width of the planks. To avoid damaging the surface, stick masking tape on it. It will prevent the laminated part from chipping.
- Open areas of the cut should be sanded with sandpaper and treated with a sealant. The silicone compound will protect against moisture and prevent mold formation.
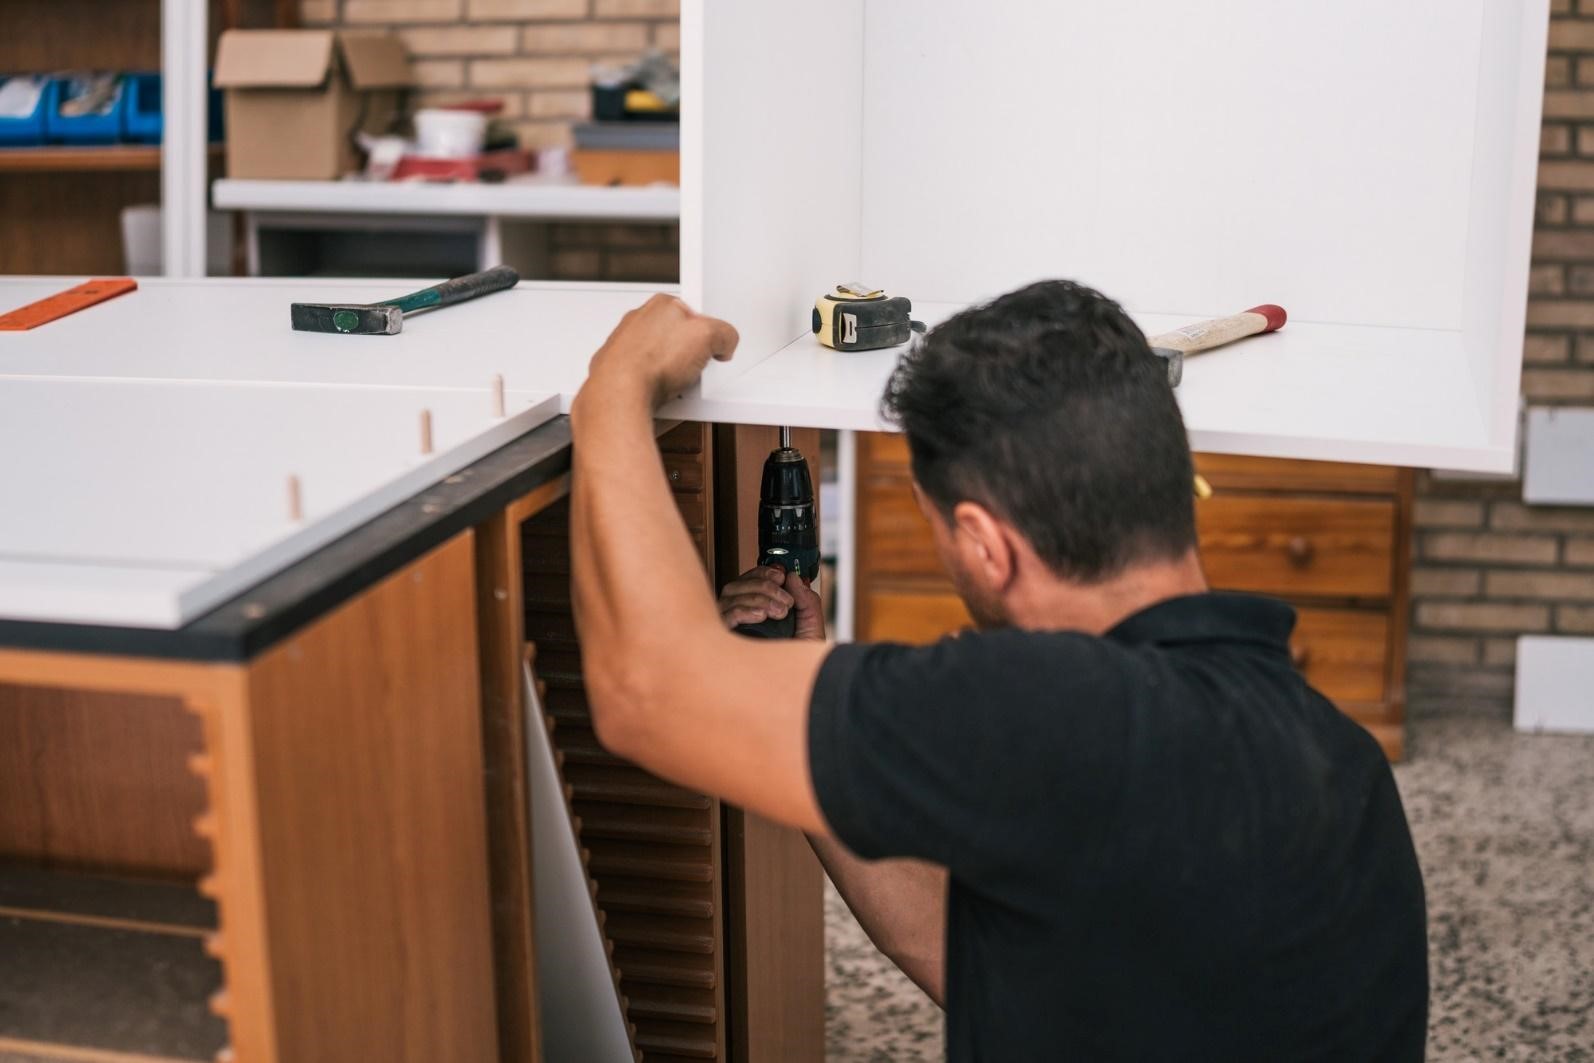
- Screw the end and connecting corners into place using self-tapping screws. However, you can proceed to this stage after the silicone sealant has dried.
- Install special ties that fix the modules. The tabletop is lowered onto them later. From below, using screws, the plate is pulled to the cabinets through these fasteners. First, you need to drill holes in them with a drill.
- Prepare the countertop for the sink cutout. This is done before the hob is finally screwed in. To avoid mistakes, prepare a sink template from paper and cardboard. Be sure to step back 15 mm from the outer border to draw the inner contour. The cut is made along it. Seal the edges. The cutout for the hob is identical.
- Secure the sink fasteners. Screws should be screwed in diagonally, approximately ⅔ of the screw length. This will allow the product to be tightened evenly. Screws are tightened to the stop only when you are sure that you have taken everything into account and done everything correctly.
How to apply a protective edge to the edge of a slab
The technology is used when a figure cut of the front part of the slab is needed. To hide the cut, the edge is pasted over with decor, which is identical in design to the working part. For this work you need:
- Heat the iron to a working temperature. It should be warm, but should not burn the material when touched lightly.
- Apply the decorated ribbon to the cut with the area where the hardened glue is distributed.
- Melt the adhesive by carefully applying the edge of the iron to the tape. The glue will begin to melt – when you remove the iron, it will harden and set. The main thing is not to overexpose it, as the film can easily be damaged.
- Remove the excess edge, and wait until it dries completely. If the glue does not stick well, you can use any other one that is suitable for fixing wood.
The final stage is installing the baseboard along the walls. A decorative overlay in the kitchen is needed to protect the panels and countertop from dirt and dust that accumulate during operation. The presence of a side will prevent the proliferation of bacteria and will also make the appearance of the working part more complete.
If you still decide to entrust the work to specialists, the proposed material will also help you. With its help, you will be able to track the quality of services of the company that will install the countertop.
Read Other: Innovative Kitchen Trends 2024: What’s New in Modern Kitchens?